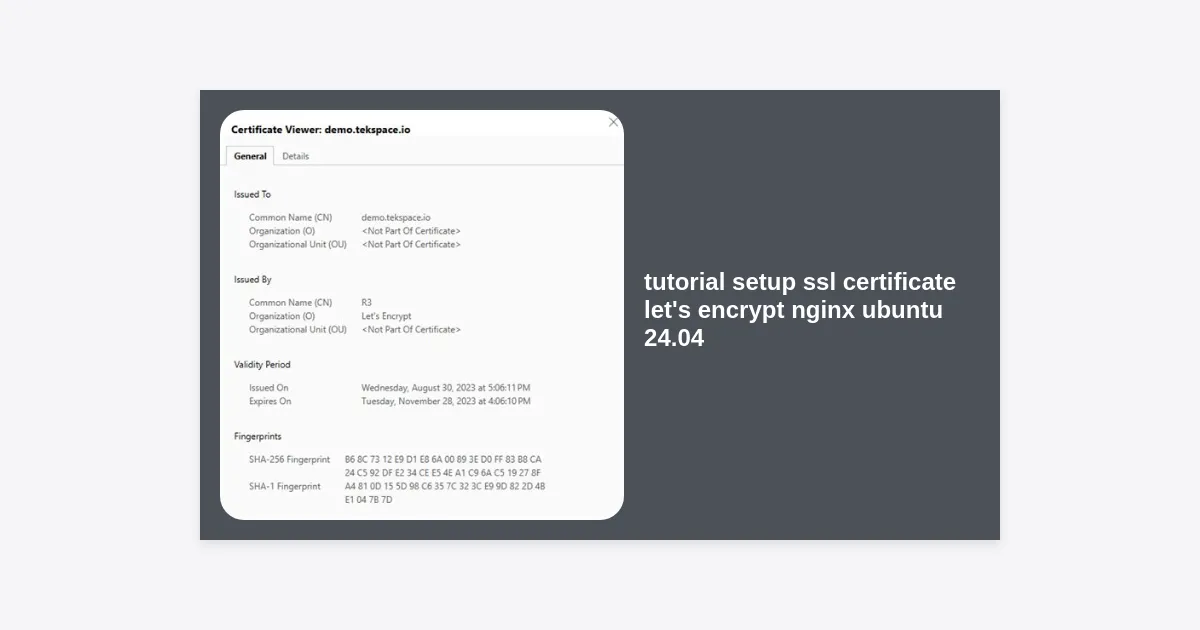
In the modern digital landscape, security is no longer an optional luxury; it is a fundamental requirement for any website. Whether you are running a personal blog, a corporate site, or an e-commerce platform, protecting your users’ data is paramount. If you are looking to secure your server, this comprehensive tutorial setup ssl certificate let’s encrypt nginx ubuntu 24.04 will guide you through every step of the process. By the end of this guide, you will have a fully functional, auto-renewing SSL certificate that ensures your site is delivered over a secure HTTPS connection, boosting both user trust and your search engine rankings.
Table of Contents
- Why SSL Matters for Ubuntu 24.04 Servers
- Prerequisites for the Tutorial
- Step 1: Installing and Preparing Nginx
- Step 2: Configuring the UFW Firewall
- Step 3: Installing Certbot and the Nginx Plugin
- Step 4: Obtaining the Let’s Encrypt SSL Certificate
- Step 5: Verifying Auto-Renewal Processes
- Step 6: Hardening Nginx Security (Best Practices)
- Troubleshooting Common SSL Issues
- Conclusion and Next Steps
Why SSL Matters for Ubuntu 24.04 Servers
Ubuntu 24.04 LTS, also known as “Noble Numbat,” represents the latest in stability and security for Linux servers. When combined with Nginx, a high-performance web server, you have a robust foundation for any application. However, without an SSL (Secure Sockets Layer) certificate, all data transmitted between your server and your visitors is sent in plain text. This makes it vulnerable to interception by malicious actors.
Using Let’s Encrypt provides a free, automated, and open Certificate Authority (CA). It has revolutionized the web by making HTTPS accessible to everyone. Implementing this tutorial setup ssl certificate let’s encrypt nginx ubuntu 24.04 not only encrypts data but also provides an SEO advantage, as Google uses HTTPS as a ranking signal. Furthermore, modern browsers like Chrome and Firefox will flag non-HTTPS sites as “Not Secure,” which can significantly increase your bounce rate.
“Encryption is the cornerstone of privacy on the internet. By using Let’s Encrypt on Ubuntu 24.04, administrators can ensure that their users’ data remains confidential without incurring the costs of traditional certificates.”
Prerequisites for the Tutorial
Before we dive into the technical steps, ensure you have the following in place:
- An Ubuntu 24.04 Server: Access to a server running the latest LTS version with a non-root user that has
sudoprivileges. - A Registered Domain Name: You must own a domain (e.g., example.com) to point to your server’s IP address.
- DNS Records: Ensure your domain’s ‘A’ record points to your server’s public IP address. Optionally, add a ‘www’ record as well.
- Nginx Installed: A basic installation of Nginx is required, which we will cover briefly in the next section.
Step 1: Installing and Preparing Nginx
If you haven’t already installed Nginx, you can do so easily using the Ubuntu package manager. First, update your local package index to ensure you have the latest information on available versions.
Execute the following commands in your terminal:
sudo apt update
sudo apt install nginx
Once the installation is complete, you should verify that Nginx is running. You can check the status using systemctl:
sudo systemctl status nginxIf Nginx is active, you will see an “active (running)” message. It is vital to have a server block configured for your domain before requesting an SSL certificate. This allows Certbot to find the correct configuration to modify automatically.
Creating a Server Block
Create a directory for your domain and set the appropriate permissions:
sudo mkdir -p /var/www/your_domain/html
sudo chown -R $USER:$USER /var/www/your_domain/html
Next, create a sample configuration file for your site in /etc/nginx/sites-available/your_domain. Ensure the server_name directive matches your actual domain name.
Step 2: Configuring the UFW Firewall
Ubuntu 24.04 comes with UFW (Uncomplicated Firewall) by default. To allow traffic for HTTPS, you must adjust the firewall settings. Nginx registers several profiles with UFW upon installation.
To see the available profiles, run:
sudo ufw app listYou will see options like ‘Nginx HTTP’, ‘Nginx HTTPS’, and ‘Nginx Full’. For this tutorial setup ssl certificate let’s encrypt nginx ubuntu 24.04, we recommend allowing ‘Nginx Full’ to permit both encrypted and unencrypted traffic (the latter is often redirected to HTTPS later).
sudo ufw allow 'Nginx Full'Verify the status to ensure the rules are applied:
sudo ufw statusStep 3: Installing Certbot and the Nginx Plugin
Certbot is the tool we use to interact with Let’s Encrypt. While Ubuntu’s default repositories contain Certbot, it is often recommended to use the version provided via snap to ensure you have the most up-to-date features and security patches.
First, ensure your snapd core is up to date:
sudo snap install core; sudo snap refresh coreNow, install Certbot using the following command:
sudo snap install --classic certbotFinally, create a symbolic link to ensure the certbot command can be run from any directory:
sudo ln -s /snap/bin/certbot /usr/bin/certbotStep 4: Obtaining the Let’s Encrypt SSL Certificate
This is the core part of our tutorial setup ssl certificate let’s encrypt nginx ubuntu 24.04. Certbot provides an Nginx plugin that automates the certificate acquisition and installation process. It will parse your Nginx configuration and update it to include the SSL certificate details.
Run the following command to start the interactive setup:
sudo certbot --nginx -d your_domain -d www.your_domainDuring this process, you will be asked to:
- Enter an email address for renewal and security notices.
- Agree to the Let’s Encrypt Terms of Service.
- Choose whether or not to share your email with the Electronic Frontier Foundation.
- Decide whether to redirect all HTTP traffic to HTTPS (highly recommended).
Once completed, Certbot will update your Nginx configuration files, and your website will now be accessible via https://your_domain. You will see a success message indicating where your certificates are stored.
Step 5: Verifying Auto-Renewal Processes
Let’s Encrypt certificates are valid for 90 days. The reason for this short lifespan is to encourage automation and limit the damage from compromised certificates. Fortunately, the Certbot package handles renewals automatically via a systemd timer or a cron job.
To ensure the renewal process is working correctly, you should perform a “dry run.” This simulates the renewal process without making any actual changes to your certificates:
sudo certbot renew --dry-runIf the dry run finishes without errors, your certificates will be automatically renewed before they expire. You can rest easy knowing your site’s security won’t lapse due to an expired certificate.
Step 6: Hardening Nginx Security (Best Practices)
Obtaining a certificate is just the first step. To achieve an “A+” rating on tools like SSL Labs, you should consider hardening your Nginx configuration further. This involves disabling older, insecure protocols and choosing strong cipher suites.
Edit your site’s configuration file and add the following headers within your server block:
- HSTS (HTTP Strict Transport Security): Tells browsers to only interact with your site using HTTPS.
- X-Frame-Options: Prevents clickjacking attacks.
- X-Content-Type-Options: Prevents MIME-type sniffing.
Example configuration snippet:
add_header Strict-Transport-Security "max-age=31536000; includeSubDomains" always;
add_header X-Frame-Options "SAMEORIGIN";
add_header X-Content-Type-Options "nosniff";
Additionally, ensure you are using TLS 1.2 and TLS 1.3, as older versions like SSLv3 and TLS 1.0 are now considered insecure.
Troubleshooting Common SSL Issues
Even with a detailed tutorial setup ssl certificate let’s encrypt nginx ubuntu 24.04, things can sometimes go wrong. Here are some common issues and their solutions:
1. Challenge Failed for Domain: This usually happens if Certbot cannot reach your server. Check your DNS settings and ensure port 80 (HTTP) is open on your firewall. Let’s Encrypt needs to verify domain ownership via an HTTP request before issuing the certificate.
2. Nginx Fails to Start: This often occurs due to a syntax error in the configuration file after Certbot modifies it. Run sudo nginx -t to check for syntax errors and fix them accordingly.
3. Mixed Content Warnings: If your site loads over HTTPS but some images or scripts are still using http://, browsers will display a warning. Ensure all internal links use relative paths or https://.
Conclusion and Next Steps
Setting up an SSL certificate on Ubuntu 24.04 with Nginx and Let’s Encrypt is a straightforward process that significantly enhances your website’s security and credibility. By following this tutorial setup ssl certificate let’s encrypt nginx ubuntu 24.04, you have successfully moved from a vulnerable HTTP setup to a professional-grade HTTPS configuration.
To summarize, the key takeaways are:
- Always keep your server packages updated.
- Use Certbot for automated certificate management.
- Ensure your firewall is configured to allow HTTPS traffic.
- Regularly test your renewal process with a dry run.
- Implement security headers for an extra layer of protection.
Now that your site is secure, you might want to look into other optimizations for Ubuntu 24.04, such as setting up a database or fine-tuning Nginx performance for high-traffic scenarios. Stay secure and keep building!