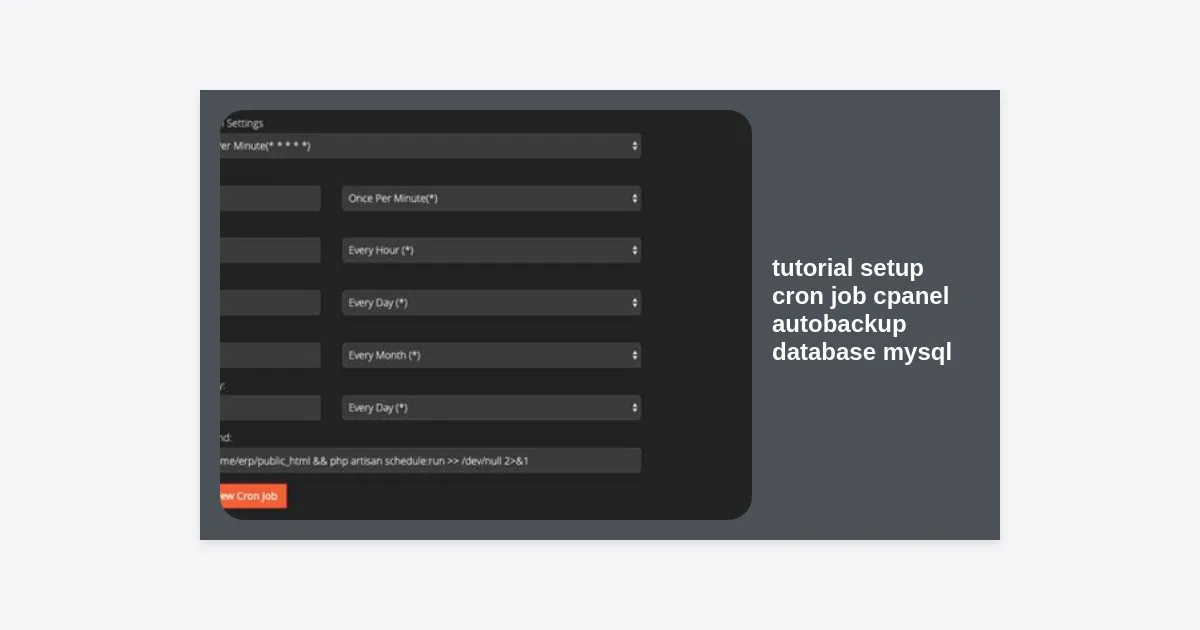
Imagine waking up one morning to find your website showing a “Database Connection Error.” You log into your server, only to realize that your MySQL database has been corrupted or, worse, accidentally deleted during a plugin update. Without a recent backup, you are looking at hours, days, or even weeks of lost work. This is where a tutorial setup cron job cPanel autobackup database MySQL becomes your ultimate safety net.
In the world of web development and server management, manual backups are often forgotten. Consistency is key to data integrity. In this comprehensive guide, we will walk you through every step of automating your database backups using cPanel’s Cron Job feature. By the end of this tutorial setup cron job cPanel autobackup database MySQL, you will have a robust system that automatically saves your data at regular intervals, giving you total peace of mind.
Table of Contents
- Why Automate MySQL Backups?
- Prerequisites for the Tutorial
- Step 1: Creating the Backup Script (PHP & Shell)
- Step 2: Uploading the Script to cPanel
- Step 3: Setting Up the Cron Job in cPanel
- Understanding Cron Job Syntax
- Best Practices for Database Security
- Troubleshooting Common Issues
- Conclusion and Next Steps
Why Automate MySQL Backups?
Data is the most valuable asset of any digital venture. Whether you are running a WordPress blog, an e-commerce store, or a custom web application, your MySQL database contains everything from user credentials to product listings and content. Relying on manual backups is a recipe for disaster because human error is inevitable.
Automating the process via a tutorial setup cron job cPanel autobackup database MySQL ensures that even if you forget, the server doesn’t. According to recent cybersecurity statistics, over 40% of small businesses never recover from a major data loss event. Automation mitigates this risk by providing consistent, timestamped recovery points.
“A backup strategy is only as good as its last successful automation test. If you aren’t backing up automatically, you aren’t backing up at all.”
Prerequisites for the Tutorial
Before we dive into the technical configuration, ensure you have the following ready:
- cPanel Access: You need valid login credentials for your web hosting account.
- MySQL Database Details: Database name, username, and password.
- File Manager Access: Ability to upload or create files in your home directory.
- Basic Command Knowledge: A fundamental understanding of how file paths work on Linux servers.
Step 1: Creating the Backup Script (PHP & Shell)
To perform a tutorial setup cron job cPanel autobackup database MySQL, we first need a script that instructs the server to export the database. There are two common ways to do this: using a PHP script or a Shell script (Bash).
Method A: Using a PHP Script
PHP is highly flexible and allows you to add features like email notifications or uploading the backup to a remote location like Amazon S3 or Google Drive later on.
Create a file named backup_db.php and paste the following code:
<?php
// Database configuration
$host = "localhost";
$user = "your_db_user";
$pass = "your_db_password";
$name = "your_db_name";

// Backup directory and filename
$backup_path = "/home/yourusername/backups/";
$file_name = $name . "_" . date("Y-m-d_H-i-s") . ".sql";
$full_path = $backup_path . $file_name;

// Execute the mysqldump command
$command = "mysqldump --user=$user --password=$pass --host=$host $name > $full_path";
exec($command, $output, $return_var);

if ($return_var === 0) {
    echo "Backup successful: $file_name";
} else {
    echo "Backup failed!";
}
?>
Method B: Using a Shell Script (Recommended for Performance)
Shell scripts are faster and use fewer resources. Create a file named db_backup.sh:
#!/bin/bash
# Configuration
DB_USER="your_db_user"
DB_PASS="your_db_password"
DB_NAME="your_db_name"
DEST="/home/yourusername/backups/"
DATE=$(date +%Y-%m-%d_%H%M%S)

# Run mysqldump
mysqldump -u $DB_USER -p$DB_PASS $DB_NAME > $DEST/db_backup_$DATE.sql

# Optional: Delete backups older than 30 days
find $DEST -type f -name "*.sql" -mtime +30 -exec rm {} ;
If you prefer a pre-configured script, you can download our optimized backup template here:
Download Backup Script Template
Step 2: Uploading the Script to cPanel
Now that you have your script, you need to place it on your server. Follow these steps:
- Log in to your cPanel account.
- Open the File Manager.
- Navigate to your home directory (usually
/home/username/). Pro-tip: Do not place the script insidepublic_htmlfor security reasons. - Create a new folder named
backups_script. - Upload your
backup_db.phpordb_backup.shfile into that folder. - Create another folder named
backupswhere the actual database files will be stored.
Step 3: Setting Up the Cron Job in cPanel
This is the core of the tutorial setup cron job cPanel autobackup database MySQL. We will now tell cPanel to run your script automatically.
- Go back to the cPanel main dashboard.
- Search for Cron Jobs in the search bar and click on it.
- Under the “Add New Cron Job” section, you will see “Common Settings.”
- Select your desired frequency. For most sites, “Once Per Day” is ideal.
- In the Command field, enter the path to execute your script.
If using PHP:
/usr/local/bin/php /home/yourusername/backups_script/backup_db.php
If using Shell:
/bin/bash /home/yourusername/backups_script/db_backup.sh
Click “Add New Cron Job” to save your settings.
Understanding Cron Job Syntax
To master this tutorial setup cron job cPanel autobackup database MySQL, you should understand what the five asterisks (* * * * *) represent. They stand for:
- Minute: 0-59
- Hour: 0-23
- Day of Month: 1-31
- Month: 1-12
- Day of Week: 0-7 (0 and 7 are Sunday)
For example, if you want your backup to run every night at 2:00 AM when traffic is low, your cron setting would look like: 0 2 * * *.
Best Practices for Database Security
Simply setting up a backup isn’t enough. To ensure your tutorial setup cron job cPanel autobackup database MySQL is professional-grade, follow these security tips:
- Off-site Storage: Don’t keep backups only on the same server. If the server hardware fails, you lose both the site and the backup. Use tools like Rclone or FTP to move files to a remote cloud.
- Encryption: Encrypt your SQL files. Database dumps contain sensitive user data in plain text.
- Retention Policy: As seen in our Shell script example, use a command to delete old backups. Otherwise, your disk space will eventually fill up.
- Test Restores: A backup is useless if it doesn’t work. Once a month, try restoring a backup to a staging environment to verify its integrity.
Troubleshooting Common Issues
If your tutorial setup cron job cPanel autobackup database MySQL isn’t working as expected, check these common pitfalls:
- Incorrect File Paths: Ensure you are using the absolute path (starting with `/home/username/`) rather than a relative path.
- Permission Denied: For shell scripts, ensure the file permission is set to
755. You can do this in File Manager by right-clicking the file and selecting “Change Permissions.” - PHP Version Mismatch: Sometimes the command line uses a different PHP version than your website. Use the full path to the specific PHP binary (e.g.,
/opt/cpanel/ea-php81/root/usr/bin/php). - MySQLdump Not Found: If the command fails, you might need to provide the full path to
mysqldump, which is usually/usr/bin/mysqldump.
Conclusion and Next Steps
Setting up an automated backup system is one of the most important tasks for any webmaster. This tutorial setup cron job cPanel autobackup database MySQL has provided you with the foundational knowledge to protect your data using both PHP and Shell methods.
Key Takeaways:
- Automated backups prevent data loss from human error or server failure.
- Using cPanel Cron Jobs is a resource-efficient way to schedule tasks.
- Always store your backup scripts outside of the
public_htmlfolder for security. - Regularly test your backups to ensure they are valid and restorable.
Now that you have secured your database, consider automating your file backups as well. Consistency is the hallmark of a professional developer. Don’t wait for a disaster to happen—configure your autobackups today!